
Email Setup
Outlook 2013 - Add New POP Email Account
This guide will give step-by-step instructions for setting up email on Outlook 2013. While it can be used for other versions of Outlook, some screens and steps might vary.
Outlook Users Note: With virtually all email clients, you can enter mail.yourdomain.com as your mail server. Microsoft has chosen to prevent this in Outlook by not allowing the user to confirm a permanent exception to the security certificate warning. Should we change servers in the future, you will be required to change these settings again if you use Outlook as your email client.
If you don't feel comfortable making these changes or you simply prefer us to do it, we can set up your email accounts remotely using TeamViewer. The cost for this service is $10.00 per email account.
Adding a new POP mail account:
- Select the File menu and choose Info
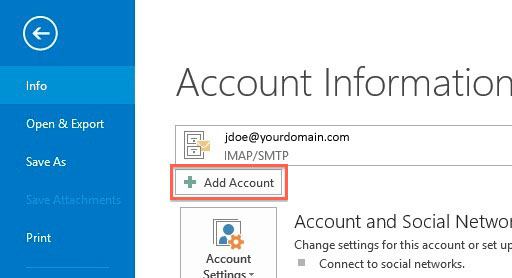
- Click the Add Account button.
- Choose Manual setup or additional server types

- Click Next.
- Choose POP or IMAP .
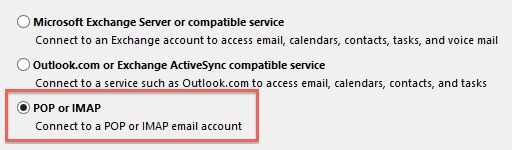
- Click Next.
Account Settings:
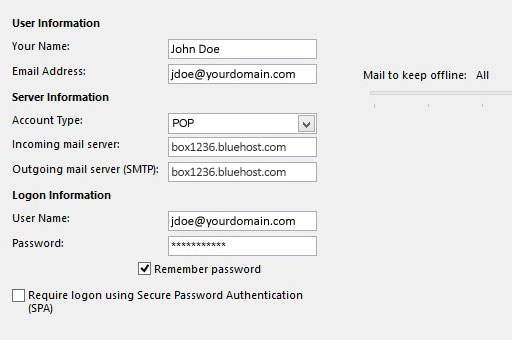
- Enter your Name as you want it to appear on your outbound email messages.
- Enter your email address.
- Choose POP as your Account Type.
- Enter box----.bluehost.com as your Incoming Mail Server. (Please contact us for the correct number to insert after 'box'. If we change servers in the future, this setting must be updated at that time. This is an Outlook-only issue.)
- Enter box----.bluehost.com as your Outgoing Mail Server. (Please contact us for the correct number to insert after 'box'. If we change servers in the future, this setting must be updated at that time. This is an Outlook-only issue.)
- Enter your email address for the User Name.
- Enter your email password.
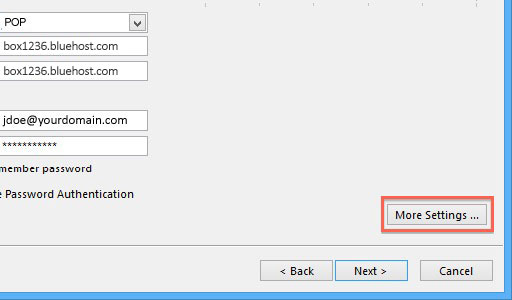
More Settings
- Click the More Settings button.
- Click the Outgoing Server tab.
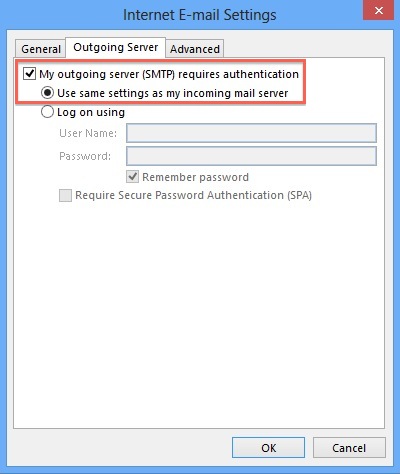
- Click the "My outgoing server (SMTP) requires authentication" checkbox.
- Make sure that it is using the same settings as your incoming mail server.
- Click the Advanced tab.
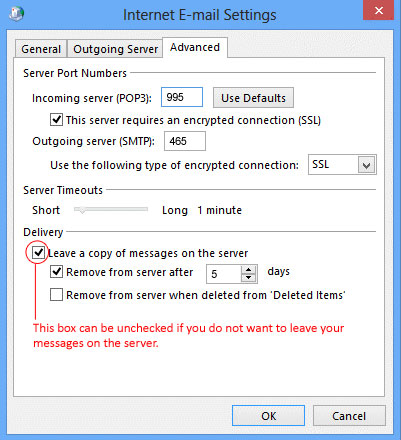
- Enter 995 for your Incoming server (POP) port.
- Check the box for "This server requires an encrypted connection (SSL)".
- Enter 465 for your Outgoing server (SMTP) port.
- For "Use the following type of encrypted connection:", choose SSL.
- If you want to leave a copy of your mail on the server for a short period of time, check the box that says "Leave a copy of messages on the server". Then, check the box to "Remove from server after" a specified number of days. We strongly recommend you set this number to no more than seven (7) days. Storing large amounts of mail on the server can cause your account to stop working. Be sure to read the warning message about removing mail from the server.
- Click the OK button.
Completing the Setup
- Click Next on the E-mail Accounts window.
- Click the Finish button.
Warning Messages
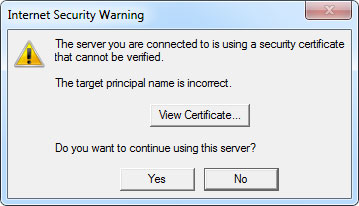
- The first time you send/receive mail you may see the following message. This is normal. Outlook needs you to confirm that you are connecting to the correct mail server.
- Click Yes to continue.
- If you continue to see this warning message after clicking Yes two times, please let us know.
Outlook 2013 is now correctly configured to send and receive emails.